
Digital modes are one of the fun ways to utilized your radio license. There are so many modes, so many frequencies, so many best practices that I though we would put this page together to act as a kind of “cheat sheet” to track all the ways we can use digital.
This will be a working document that we can all keep updated as things change so we are all on the same page when it comes to setting up the various modes. We will also lay down some assumptions to use when setting up for digital operation.
Which side band mode does one use for Digital?
This is an excellent question and one that can be confusing at first. All HF digital modes use UPPER SIDE BAND. It’s counter intuitive since 40, 80 and 160 meter phone use lower side band. But even on these frequencies upper side band is used for digital operation.
What frequencies do I use?
Another excellent question that can be very confusing even for old-timer digital operations. If you are trying to work someone you know you can use any frequency recommended by the FCC for digital operations. For example, on 40 meters that would be anywhere from 7.000 to 7.125 MHz for Extra class operation and 7.025 to 7.125 MHz for General and Advance operation.
But I am a Technician, can I use digital modes? Of course! The original digital mode (CW) can be used on 40 meters, for example, from 7.025 to 7.125 MHz. Even if you don’t want to use a Morse keyer you can use your computer to send and receive Morse code using CW in this portion of the band. I do this all the time and it’s fun to watch a computer decode Morse code.
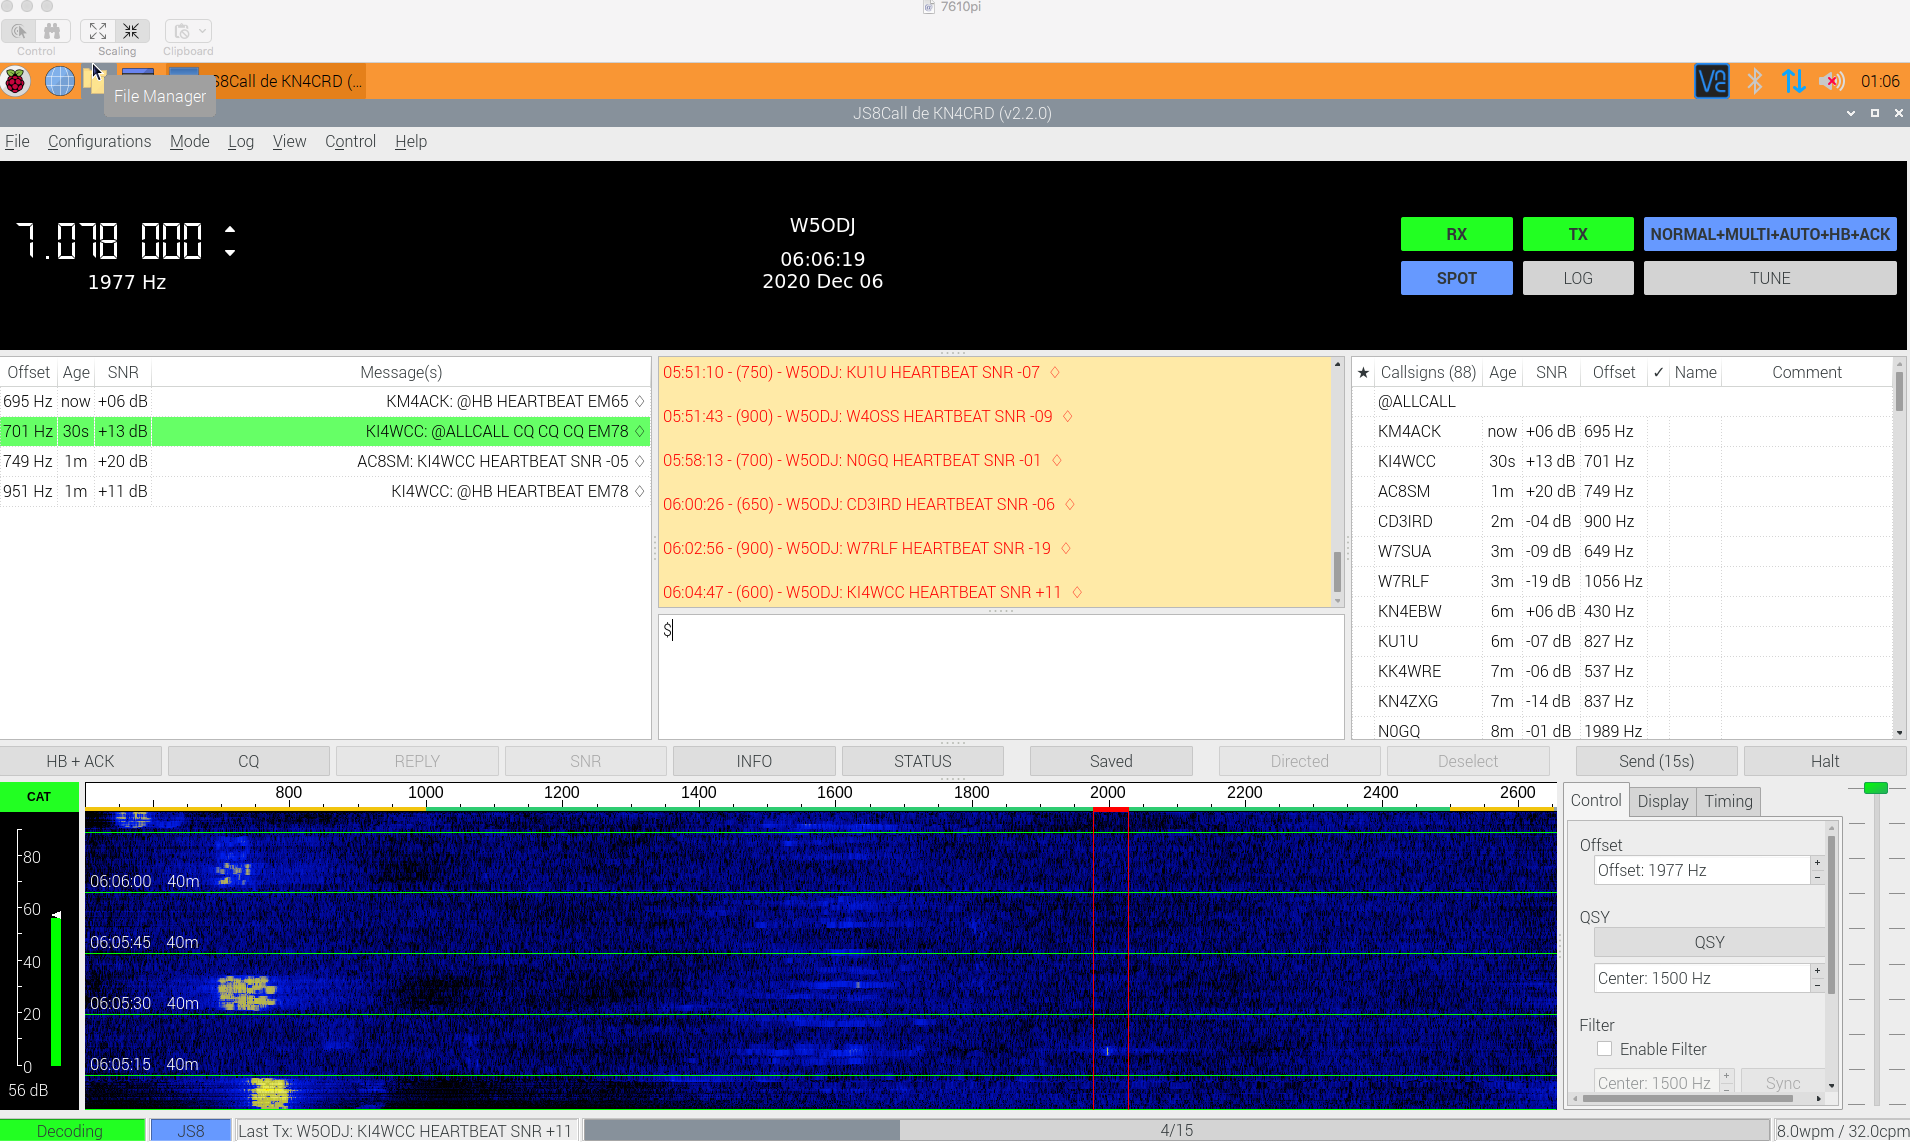
If you are interested in meeting others you will need to go to a spot in the band where they are expected to hang out. That is going to be different depending on the mode you want to use. I’ve compiled this chart in figure 1 for the two modes I use most to help guide you in the direction of communication with others.
| Band | Frequency | Mode | Notes |
|---|---|---|---|
| 160 | 1.838 | PSK | Proposed frequencies for PSK31 |
| 80 | 3.580 | PSK | Proposed frequencies for PSK31 |
| 40 | 7.035 | PSK | Proposed frequencies for PSK31 Region 1 & Region 3 |
| 40 | 7.070 | PSK | Most PSK31 Regions 2 activity |
| 40 | 7.080 | PSK | Proposed frequencies for PSK31 Region 2 |
| 30 | 10.142 | PSK | Proposed frequencies for PSK31 |
| 20 | 14.070 | PSK | Proposed frequencies for PSK31 |
| 17 | 18.100 | PSK | Proposed frequencies for PSK31 |
| 15 | 21.070 | PSK | Most PSK31 activity |
| 15 | 21.080 | PSK | Proposed frequencies for PSK31 |
| 12 | 24.920 | PSK | Proposed frequencies for PSK31 |
| 10 | 28.120 | PSK | Proposed frequencies for PSK31 |
| 6 | 50.290 | PSK | Proposed frequencies for PSK31 |
| 160 | 1.842 | JS8 | |
| 80 | 3.578 | JS8 | |
| 40 | 7.078 | JS8 | |
| 30 | 10.130 | JS8 | |
| 20 | 14,078 | JS8 | |
| 17 | 18.104 | JS8 | |
| 15 | 21.078 | JS8 | |
| 12 | 24.922 | JS8 | |
| 10 | 28.078 | JS8 | |
| 6 | 50.318 | JS8 | |
| 2 | 144.178 | JS8 |
Hopefully as other contribute to this page the other modes will show up in list in Figure 1. While I don’t use FT8 it is an extremely common digital mode. As of this writing I am not educated in the various calling frequencies and operation of that particular mode. If you are familiar with the mode maybe you can fill in the chart in Figure 1.
How do I interface my radio with a computer?
There are a ton of ways to go about this. For this discussion we will talk about only one of those ways. Seasoned digital folks already know how to do this so this brief tutorial is going to talk through the way this author prefers to use the mode.
Over the last 10 years I’ve gone through so many iterations of interfacing my computer with my radio. Some of them worked OK while other ideas didn’t work at all.
For example, if I ran one radio with one sound card on my Mac Mini I could get it to work with some fiddling. Two radios, two sound cards, forget it! Something would invariably get confused and the whole thing would stop working.
This is part of the initial frustrations you may have with digital. It take some fiddling up front to wrap your arms around all the moving part. Let’s talk about the moving parts.
Digital mode components
Radio
It is probably obvious but I’m going to state the obvious here. You need a radio. You don’t have to use HF as digital is successfully done with UHF and VHF as well. For many years I did 2 meter packet radio and enjoyed using this to communicate with my father many states away using “store and forward” type messages in that mesh of radio gear. Winlink also commonly uses VHF to send WINLINK messages to other users. The common part of all this is the radio component.
Sound Interface
I’m going to talk most about a device called a USB Signalink made by a company called Tigertronics since that is what I’ve used for so many years. I have one for each of my radios and each of them has different interfacing while using the same box.

For example, I have one for my 7610, one for my 7300 and another each for my 2820 and Kenwood TS-2000. The only difference is the cable. The rest of the operation is exactly the same! You don’t need three, that’s for sure. One will do. I do have three for a reason which I’ll explain here soon.
A cable specific to your radio can be obtained when you buy one of these devices. It will be included in the purchase. If you tell them the radio you will interface they will build the interfacing into the device for you or you can buy an interface kit plug in module to install yourself. You can do what I’ve done and just do the interfacing on your own.
I’m not going to get into the specifics of interfacing in this version 1 document since it is so specific to each of our radios. Later I may come back around and fill in some of these blanks for you.
It should also be noted that each of the ICOM radios I currently own has it’s own sound card built in for you to use if that is desired. I tried doing that but prefer the method above instead. I just like the more tactile and discrete feel of the external sound interfacing.
If you don’t want to use a sound card interface and use the internal sound card with the radio it’s one less device and cable you need to use. That’s a plus for go-kit operations. Less stuff to lose in a box for sure. I still prefer the external sound interface.
CAT Control (Radio Control)
CAT stands for “computer aided transceiver”. It’s also commonly called “Rig Control”.
This is a feature that’s not required to have but is nice to use if you can. It gives you the ability to use the digital program to control your radio for things like PTT (push to talk) and changing the frequency if you are spinning around the various frequencies listed in Figure 1 above. CAT just makes digital easy.
For my setup I used a dedicated CI-V interface for each radio. For my station I bought this device that uses my USB ports, a standard FTDI chipset and the mono-jack connector found on the back of my ICOM radios. In my installation it was a “plug-and-play” device that I do not have to fiddle with at all. I’ve never had any trouble with it and it’s never failed to operate at any time.
Each of my radios had the capability to do CAT control over the same USB cable used for the internal sound card. Again, this would simplify the installation of digital in my setup to a single USB cable but it’s not my preferred method of operation. You may not want to buy a separate CAT control cable in your operation.
Computer
Ah, what computer to use? Another good question.
For every human running a radio there is a dedicated and very unique computer interface that goes with that human. Some people like using tablets, others phones, some Windows, some Linux, some Mac. So what to use?
From my perspective, you can use your computer and operating system of choice. All fo the programs I use are compiled to be used on Windows, Linux and Mac OSX. I do find that they run best on Windows or Linux. This page is going to initially focus on Linux and a Raspberry Pi.
It’s going to sound a little crazy but I use a dedicated Raspberry Pi 4 for each radio. Each one has it’s own SignaLink USB, it’s own CAT control and it’s connected to my network with an ethernet cable.
The Raspberry Pi computers I use can be obtained from Amazon with everything you need to interface with your radio. This will include the computer module, memory, HDMI interface, power supply, case … everything you need to run the operating system. I’m not going to explain in this version 1 document exactly how to download and install Raspian operating system. But it is very easy to do by following these instructions.
Once you get the Raspberry Pi set up you will want to install the digital programs you want to use. In these examples I’ll be going over FLDIGI for Linux. Installing this program on top of Raspian is very easy.
One more consideration is to just install the “HamPi” images which will install all of the most common programs and other tools commonly used in digital mode operation. This is a very comprehensive list of tools you can use and they have done all the work for you.
In my case, I use two programs (FLDIGI and JS8CALL). So that is all I install on my Raspberry Pi computers. Both of the programs I use are installable from the command line using the apt-get command. Again, I’m not going to get in that detail here in this version 1 document but will do my best to update this page in the future with all these details.
So to net out the computer and software, I use a Raspberry Pi 4 and FLDIGI for all of my digital communication I use for the LARG nets as well as all my personal digital QSOs from y QTH. It is easy, quick and extremely reliable. Very consistent in my operation of the gear.
So before you go any further make sure you have your computer set up and FLDIGI installed. Do the best you can to interface your radio and if you have any problems at all send an e-mail to us and we’ll help you get unstuck.
Operating
Once you have your radio interfaced, the computer set up and the software packages installed it’s time to operate.
What I do with my set up is to use VNC to connect to my Raspberry Pi computers. Since my main station operating system is Mac OSX I will use VNC to connect to the Pi and operate that Pi computer with a “Remote Desktop”. This is nice because I can leave my radios on and operate them from anywhere. Even remote through my VPN! Since all I need is network access to use VNC and reach my Pi computers it makes it easy to call them up at any time.
Using the VNC method also separates “Church and State” in my operating method. Since my Mac is not using it’s CPU to decode digital modes it is never in the way of operating digital modes. I can kill the VNC session and the computer continues to run in auto-pilot mode with my primary computer shut completely down. This is cool because I can continue to give automated signal reports to anyone who needs them while I am not using my computer/radios for normal operation.
Frequency Setup
A quick note on frequency setup. It takes a little brain work to get on the proper frequency with everyone else. Remember we operate in USB mode and DIGITAL mode if you have it (USB-D1 in my case).
If you visit the Nets page of our web site you will see that we operate on 3.58275 MHz in Olivia 500/8 on the Sunday night digital net during the winter months. So how will you set up your VFO to manage this?
What I do is put my VFO on the desired frequency minus 1500 hz. So in this case it would be 3.58125 (382750-1500) and put my AFSK carrier on the 1500 mark in the waterfall window. What this will do is put my frequency at 3.58125 and then use +1500 hz frequency above my base frequency to transmit the AFSK tone.
I believe some programs compensate for all this math (Ham Radio Deluxe maybe?) but I’m not aware of any free programs that do that.
My setup looks like this Figure 2.
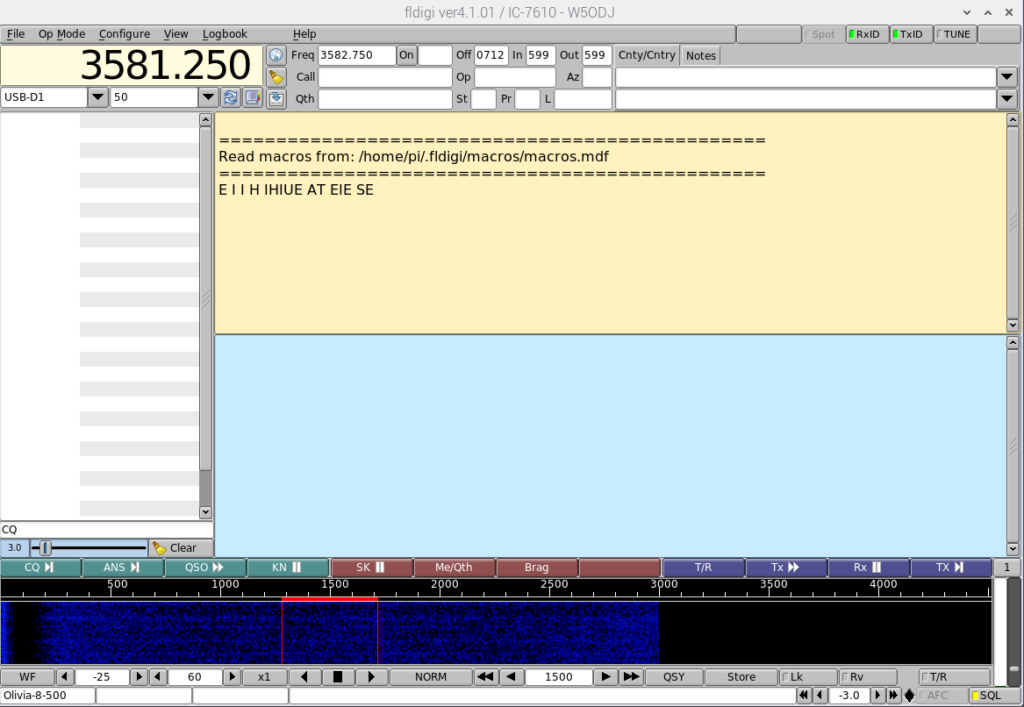
You can see that I’m set up to use Olivia 5-800 with my center frequency at 3581.250 Khz with my cursor set to +1500 hz in the waterfall. This will insure that when I am in USB-D1 mode that I am using the proper side band and be on the same frequency that everyone else who uses the mode for Sunday night nets will all be at the same place and using the same mode of operation.
Conclusion (for now)
I recognize that I’m leaving out a ton of information here. We will fill this in over time. This commentary will give you something to work with that should get you on the air. Remember, it’s not easy and I recognize this. So if you get stuck please reach out to us and we will help you get going. For a copy of the PowerPoint presentation from our January 16, 2021 club meeting go here.
See you on the air!
73 de W5ODJ